How to register a DLL file in Windows 7 (32 bit)?
For adding DLL files in the system registry, we need to do the following steps;
Step 1:
The First Step of registering/Adding DLL files in Windows 7, click on Start, then Run.
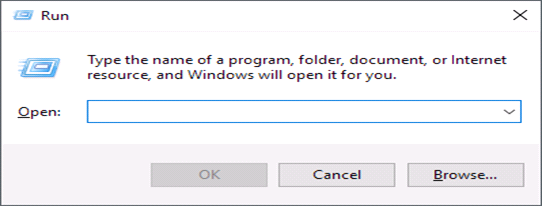
Step 2:
Now type regsvr32 command in the above column.
Step 3:
Now Add a DLL file name which you wants to add in the system registry.
For example;
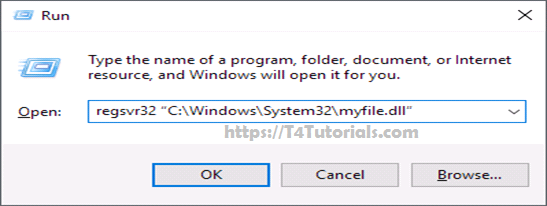
Step 4:
Now click OK and you should get a confirmation message that the DLL has been registered successfully.
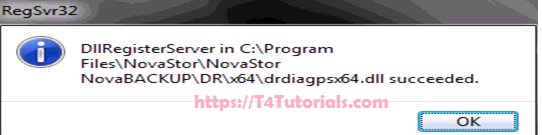
That’s it! Now your DLL has been successfully added to the registry and can be used by Windows programs.
Note:
Sometimes there is an issue of 64 bit or 32 bit window system therefore if we want to add DLL files in 64 bit windows then we need to run the CMD command by right clicking the CMD and open it through run as Administrator option, after that add a DLL file name which you wants to add in system registry.
If still you are not able to register a DLL file and you end up getting an error message saying that the attempt to register the DLL file failed, you might want to disable UAC (User Account Control) in Windows.